The AeroPress used to be invented by means of Alan Adler, an engineer who used to be pissed off with the period of time it took to make a excellent cup of espresso in a regular drip espresso device. If you are like Adler and on the lookout for a handy guide a rough and simple method to make a perfect cup of espresso—particularly at the pass—the AeroPress espresso maker is an implausible possibility. Learn on for step by step AeroPress directions and different helpful guidelines.
TABLE OF CONTENTS
What Is an AeroPress Espresso Maker?
The AeroPress is a straightforward brewing manner that lets you temporarily press scorching water via espresso. Whilst it is not probably the most trendy of espresso makers, it’s light-weight, very transportable, and can brew up a candy, full-bodied cup of espresso each time. That is why it is incessantly the most well-liked brew manner for tenting espresso.
AeroPress Equipment
To get began, you’ll want a couple of equipment on your AeroPress; right here’s an entire buying groceries record:
AeroPress Directions: The Inverted AeroPress Means
We choose the inverted AeroPress manner, because it prevents dripping and permits for higher keep an eye on over brew time. Apply those AeroPress directions for a perfect cup of espresso at the pass.
1. Warmth the Water
Carry your kettle water to a boil, or for those who’re the use of a temperature-controlled kettle, set it to 205°F.
2. Prep the Filter out
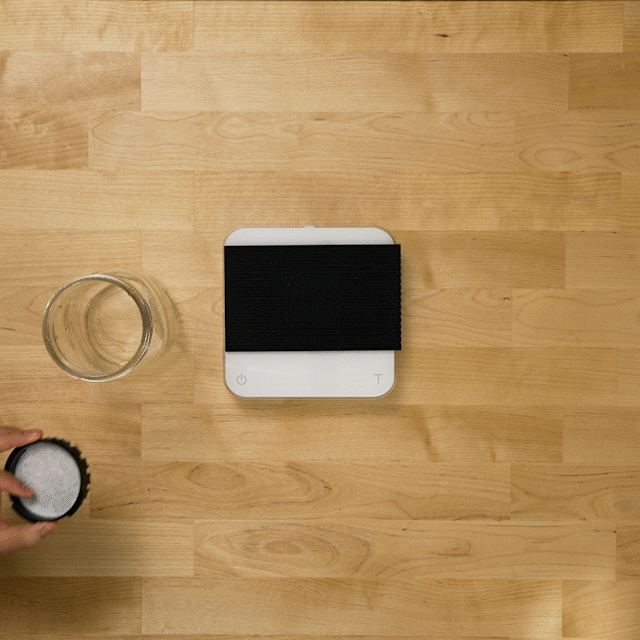
Unscrew the black AeroPress cap earlier than hanging the round paper filter out within it. Rinse the filter out with heated water to take away the paper odor/style. Shake out the rinse water out of your AeroPress cap and put aside.
3. Measure Your Espresso
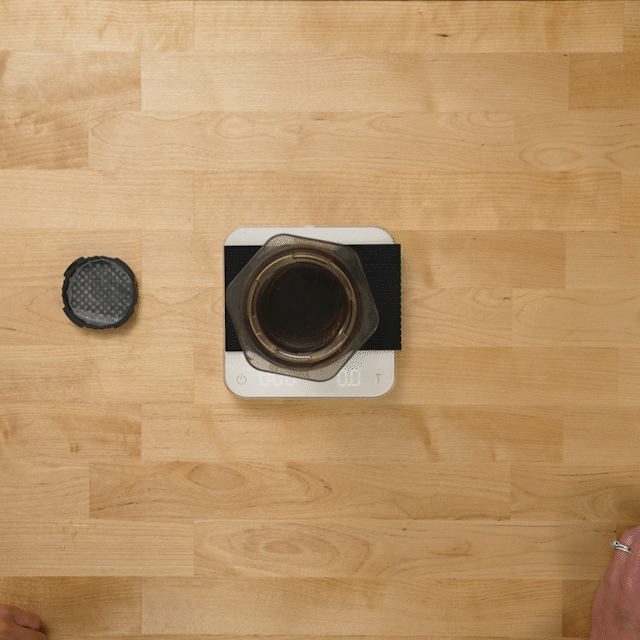
Tare your scale and upload 15g (or 3 tbsp.) freshly floor espresso into the filter out. Give it a steady shake to degree out the grounds. Tare your scale once more.
4. Get started the Brew
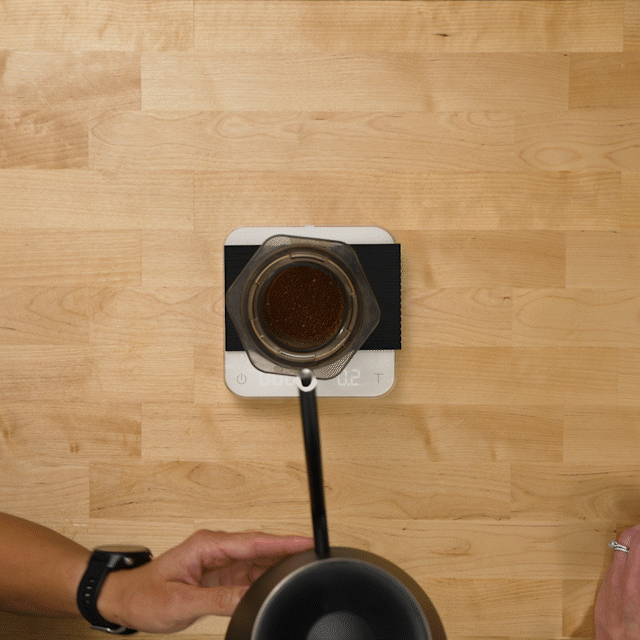
There can be two pours in overall. That is the primary. Get started your timer and bloom the espresso by means of pouring 40g of heated water onto the grounds. This primary pour must be about double the burden of your espresso. The function is to saturate the entire grounds. Let bloom for 30 seconds and benefit from the aroma!
5. Pour Once more
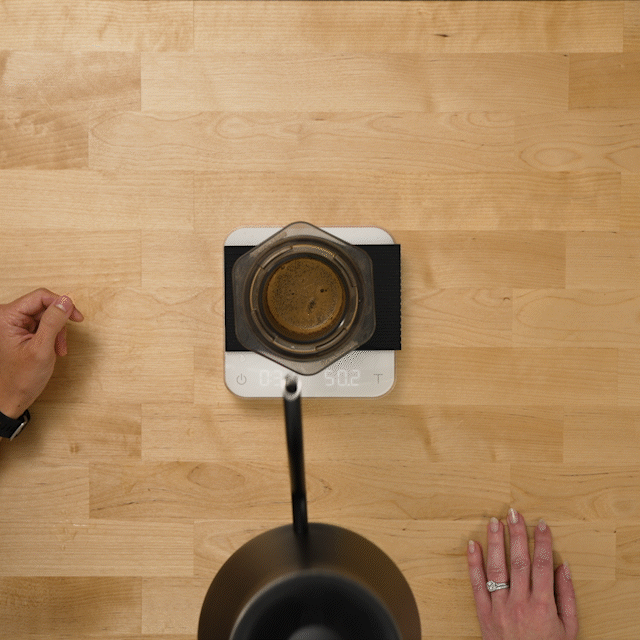
Pour your subsequent spherical of water (every other 200g) about 1-inch clear of the highest of the AeroPress. After your pour, connect the cap with the filter out and screw it in position.
6. Connect the Cap
Protected the cap in position.
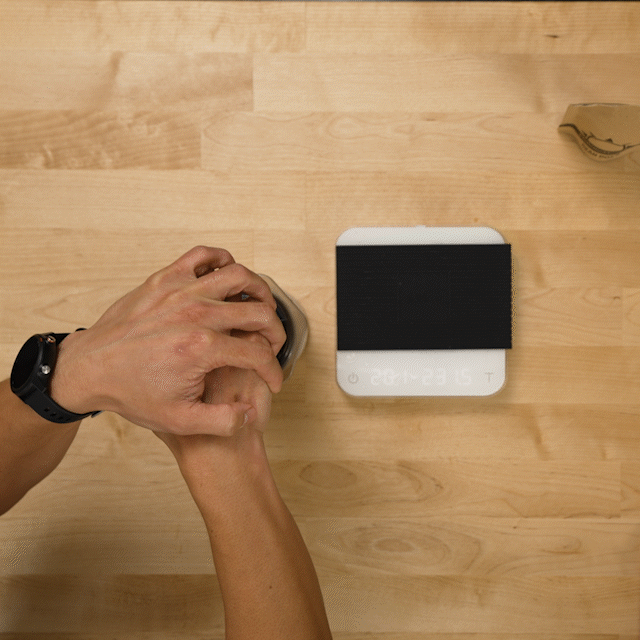
7. Invert the AeroPress
On the 2-minute mark, get ready to invert the AeroPress. We love to carry a mug over the cap earlier than flipping it, however the plunger’s seal must save you maximum leaks.
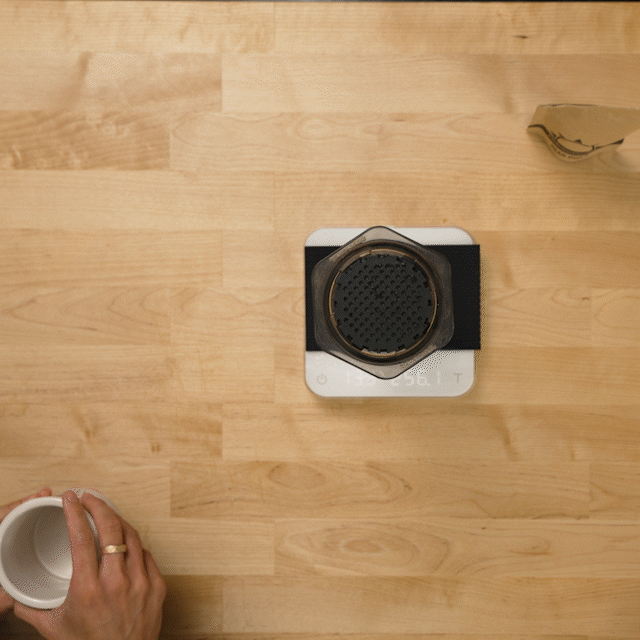
8. Stay up for the Hiss
Slowly push the plunger down till you listen a hissing sound. This step must take about 30 seconds.
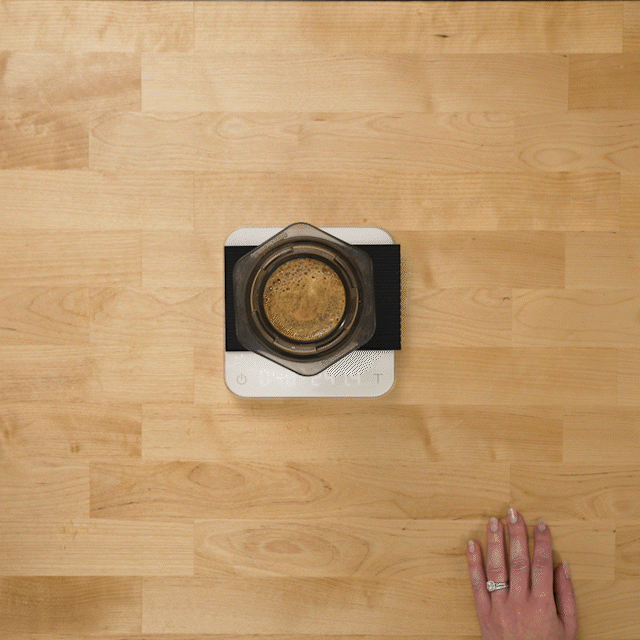
9. Serve

Pour your espresso and experience!
Wish to experiment with different recipes? AeroPress publishes recipes from the Global AeroPress Champions right here.
The Perfect Espresso for an AeroPress
Mild to medium roasts style particularly scrumptious within the AeroPress, for the reason that fast extraction and paper filter out lead to a blank and vibrant cup that permits complicated taste notes to polish.
Easy methods to Blank an AeroPress
In contrast to many brew strategies, it’s protected to scrub the AeroPress within the dishwasher (most sensible rack), even though we nonetheless suggest hand-washing it with heat water and unscented dish cleaning soap. You’ll indisputably wish to take away the seal from the top of the plunger and provides it a excellent blank once in a while.
AeroPress Comparisons
AeroPress vs. AeroPress Pass
Even supposing the normal AeroPress is transportable, AeroPress additionally makes a model in particular for go back and forth, referred to as the AeroPress Pass. Right here’s how the 2 evaluate:
- Dimension: The AeroPress Pass is undeniably smaller and lighter (even though the unique AeroPress isn’t large and ponderous whatsoever).
- Garage: The AeroPress Pass is saved in a small cup with a silicone lid. The common AeroPress doesn’t include any garage.
- Portions: The unique AeroPress comes with a funnel, whilst the AeroPress Pass comes with a folding stick for stirring.
- Compatibility: Just like the AeroPress, the AeroPress Pass is appropriate with the Fellow Prismo attachment for the ones short of to make an espresso-like drink.
General, there’s now not a lot of a distinction between the AeroPress and the AeroPress Pass, and we’ve all the time discovered the unique AeroPress to paintings nice for go back and forth. They’re even priced about the similar (even though the AeroPress Pass is if truth be told $2 extra on Amazon).
AeroPress vs. Pour Over
Right here’s how the AeroPress differs from a pour over manner:
- Serving Dimension: The AeroPress will yield about 8 oz of espresso at a time, whilst the Hario and Chemex can scale up the recipes to serve a couple of other folks without delay.
- Means: With a pour over manner such because the Chemex, you actually pour scorching water over floor espresso and thru a paper filter out. Whilst you necessarily do the similar with the AeroPress, there’s the added step of pushing a plunger down.
- Style: AeroPress recipes will also be extraordinarily flexible, taking into account lots of experimentation. This may end up in the whole thing from colourful, mild and refreshing cups to silkier and extra concentrated cups.
- Portability: The AeroPress travels neatly, whilst the Chemex does now not. (When you’re on the lookout for a pour over brewer that travels neatly, check out the plastic Hario V60.)
We wish to can help you make higher espresso at house. Our suggestions are our personal, and not backed. When you see one thing you like and purchase it via our hyperlinks, we might obtain an associate fee (thank you for that!).